NFC on Android with React and TypeScript using Capacitor or Cordova

This article has been written in 2019. I stopped working with NFC on mobile a few years later.

Ionic Capacitor and Apache Cordova are two common wrappers to create a hybrid mobile application from a web application. The main advantage over a native mobile app is the re-usability of the code — and the development languages being HTML, CSS, and JavaScript, if we like them.
However, hybrid apps are not always the best choice and some research is necessary to determine which technology is best for a particular purpose.
One thing to keep in mind though, is that using a mobile wrapper to create a hybrid app which is nothing more than a shell for a website, is not well accepted.
Let's say we have a nice responsive web app which works already great on a mobile browser, and which would be even greater if it could use NFC features on mobile devices.
As we cannot access NFC from a web browser (yet), we need to create a mobile app.
As our web app is already designed to be displayed well on small screens (responsive), creating a hybrid mobile app from it will be much easier and quicker than recreating a native mobile app from scratch (or more than one: one for each platform we want to support…).
To demonstrate this, we will start by creating a React app — with TypeScript — add the PhoneGap NFC plugin, then wrap our app with Capacitor or Cordova. We will need Node and npm (use a Node version manager, like nvm), the Android SDK and Android Studio.
Web App
First, we create a new React app by running:
npx create-react-app react-nfc --typescript
npx allows to execute npm package binaries without having to install them.
Then we jump in the newly created folder and install PhoneGap NFC and its types for TypeScript:
cd react-nfc
npm i phonegap-nfc
npm i --save-dev @types/phonegap-nfc
The PhoneGap NFC stuff will be accessible globally, so we don't need any imports in our code.
Now we open src/App.tsx and we replace its content by the following code, which is going to initialise NFC, invite the user to open the phone settings if NFC is not enabled, and read the content of an NFC tag (PhoneGap NFC offers plenty of other features documented here):
import React from "react";
import "./App.css";
/** Type for the possible steps of the app */
type TStep =
| "initializing"
| "noNfc"
| "nfcNotEnabled"
| "waitingForNfcEnabled"
| "waitingForTag"
| "cancelled"
| "tagRead";
const App: React.FC = () => {
const [step, setStep] = React.useState<TStep>("initializing");
const [tagContent, setTagContent] = React.useState("");
// Initialize NFC when the app is started
React.useEffect(initializeNfc, []);
function initializeNfc() {
// If nfc is undefined, NFC is not available on this device, or
// the app is running in a web browser
if (typeof nfc !== "undefined") {
// Register an event listener
nfc.addNdefListener(
onNdefEvent, // The callback function for the event listener
() => setStep("waitingForTag"), // Success → We're waiting for an event
() => setStep("nfcNotEnabled"), // Error → NFC must not be enabled
);
} else {
setStep("noNfc");
}
}
function onGoToSettingsClick() {
if (typeof nfc !== "undefined") {
// Ask the device to open the NFC settings for the user
nfc.showSettings(
() => setStep("waitingForNfcEnabled"),
() => alert("An error occurred while trying to open the NFC Settings."),
);
}
}
function onNdefEvent(e: PhoneGapNfc.TagEvent) {
// Unregister the event listener
nfc.removeNdefListener(onNdefEvent);
setTagContent(
// Retrieve the payload of the tag and decode it
// https://www.oreilly.com/library/view/beginning-nfc/9781449324094/ch04.html
ndef.textHelper.decodePayload(
(e as PhoneGapNfc.NdefTagEvent).tag.ndefMessage[0].payload,
),
);
setStep("tagRead");
}
function onStopClick() {
if (typeof nfc !== "undefined") {
// Unregister the event listener
nfc.removeNdefListener(onNdefEvent);
}
setStep("cancelled");
}
return (
<div className="nfc">
{step === "initializing" ? (
<div>Initializing...</div>
) : step === "noNfc" ? (
<div>
The device you are using doesn't appear to have NFC; or, the
PhoneGap-NFC plugin hasn't been set up correctly.
</div>
) : step === "nfcNotEnabled" ? (
<div>
<div>
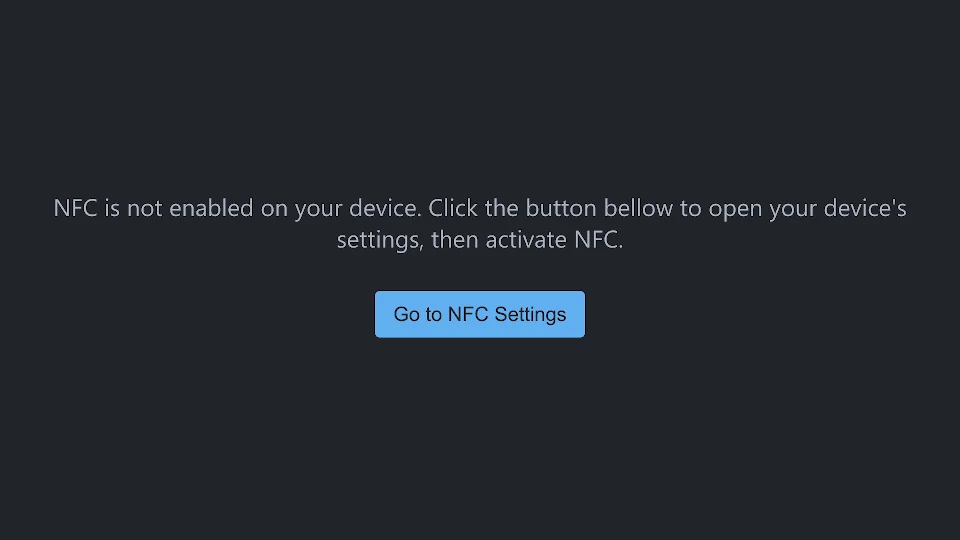
NFC is not enabled on your device. Click the button bellow to open
your device's settings, then activate NFC.
</div>
<button onClick={onGoToSettingsClick}>Go to NFC Settings</button>
</div>
) : step === "waitingForNfcEnabled" ? (
<div>
<div>Please click the button below once you have enabled NFC.</div>
<button onClick={initializeNfc}>Initialize NFC Reader</button>
</div>
) : step === "waitingForTag" ? (
<div>
<div>Scan a NFC Tag to see its content</div>
<button onClick={onStopClick}>Stop NFC Reader</button>
</div>
) : step === "tagRead" ? (
<div>
<div>Tag scanned! Here it's content:</div>
<div>{tagContent}</div>
<button onClick={onStopClick}>Stop NFC Reader</button>
</div>
) : (
<div>
<div>Bye!</div>
</div>
)}
</div>
);
};
export default App;
We add some styling in App.css:
.nfc {
	height: 100vh;
	width: 100vw;
	background-color: #21252b;
	color: #abb2bf;
	display: flex;
	flex-direction: column;
	justify-content: center;
	text-align: center;
}

.nfc div {
	padding: 8px 16px;
}

button {
	margin: 16px;
	border: none;
	border-radius: 3px;
	padding: 8px 12px;
	background-color: #61afef;
	color: #21252b;
	cursor: pointer;
}
We can now build the project:
npm run build
And that's it for our app. The full project can be found here.
Mobile Wrappers
Now, we are going to wrap our web app to create an Android one. Once with Capacitor, once with Cordova (this is twice the same thing, we only do it to show case the two solutions).
Preparing the Android device
- Activate the Developer Mode: open the Android settings, go in System → About device, then tap Build number quickly seven times.
- Activate USB Debugging: in Settings → System → Developer options, turn USB debugging ON.
- Connect the device to the computer.
- If a notification USB charging this device appears, tap on it and select Transfer files.
- Answer OK when Android asks Allow USB debugging?.
Capacitor
We run the following commands to install Capacitor, initialise it for our web app (our built app files are located in the build folder), and add the Android platform to our project:
npm i @capacitor/core @capacitor/cli
npx cap init --web-dir build
npx cap add android
If an error occurs, see the first point in the Notes section below.
We can now start Android Studio, open the newly created android folder as a project, wait for the scripts execution to finish, then click Run → Run 'app' to execute our app on our device.
From now on, if we make changes to our web app, we just need to run the following two commands to rebuild the app and update the Capacitor project:
npm run build
npx cap sync
(If Android Studio is a bit lost, Project → Rebuild might help — if it is still lost, closing the project and reopen the android folder should work. Likewise, unplugging and plugging back the device might sometimes help is the Android debugger doesn't recognise it.)
Resources with Capacitor
The app logo and splash screen are located in the android/app/src/main/res folder.
To create a new logo, in Android Studio, right click on the res folder then select New → Image Asset.
To change the splash screen, generate the images using a tool like this one, then place them in the res folder.
Cordova
Cordova requires a few tweaks in the web app itself.
First, we need to replace the following line in src/index.tsx:
ReactDOM.render(<App />, document.getElementById("root"));
by:
document.addEventListener(
	"deviceready",
	() => ReactDOM.render(<App />, document.getElementById("root")),
	false,
);
Then, we need to add the following parameter in package.json — at the same level of name, version, etc.:
"homepage" : "./",
We can now rebuild the app:
npm run build
Now, we need to set up our environment:
- Create the
ANDROID_SDK_ROOTvariable - Add the
binfolder of graddle in thePATH - Make sure the graddle executable is actually executable
Replace the <...> in the following commands before running them:
export ANDROID_SDK_ROOT=<path-to-the-android-sdk>
export PATH=$PATH:<path-to-android-studio>/gradle/gradle-<version>/bin
chmod +x <path-to-android-studio>/gradle/gradle-<version>/bin/gradle
We can now create our Cordova project:
npx cordova create Cordova com.example ReactNfc
cd Cordova
npx cordova plugin add phonegap-nfc
npx cordova platform add android
If an error occurs, see the second point in the Notes section below.
We place our web app in the Cordova project by copying the content of the build folder in the Cordova/www folder (after having deleted everything in Cordova/www). We also need to add the following line in index.html:
<script src="cordova.js"></script>
As index.html is minified, to make it simple, we just paste this line at the end of the file, just before the </body></html> tags. So the file ends by:
<script src="cordova.js"></script></body></html>
That's it! Cordova requires a few more tweaks than Capacitor, but we now just have to run:
npx cordova run
to launch our app on our device!
Hopefully this article has given you the basics to create a hybrid mobile app from a web app and use a native feature with it such as NFC. Happy coding!
Oh, and if you are going to use a package often, you might want to install it instead of using npx, especially Cordova which can take a while to start. It's recommended to install it locally in the project folder.
To do so, first create the Cordova project with npx then jump in the Cordova folder and run:
npm i cordova
Now open the file package.json — still in the Cordova folder — and add the following script in the "scripts" section:
"cordova": "node_modules/cordova/bin/cordova"
You can now run, for instance:
npm run cordova run
To install Cordova globally, you can run:
sudo npm install -g cordova
Notes
- An error occurred when I was initialising Capacitor with the PhoneGap NFC plugin. I had to open the file
node_modules/@capacitor/cli/dist/android/update.jsand replace line208from:
const pathParts = getPathParts(configElement.$.parent);
to:
const pathParts = getPathParts(
	configElement.$.parent || configElement.$.target,
);
This problem has been fixed already, it will probably be pushed on NPM with the next update of Capacitor.
- An error occurred when I was initialising Cordova with the PhoneGap NFC plugin. I had to open the file
Cordova/plugins/phonegap-nfc/plugin.xmland comment out the following section (starting at line39):
<edit-config file="AndroidManifest.xml" target="/manifest/uses-sdk" mode="merge">
    <uses-sdk android:minSdkVersion="19" />
</edit-config>
then delete the folder Cordova/platforms/android and execute again:
npx cordova platform add android
This error has been identified.